


What is drip irrigation and what are its benefits?
Drip irrigation may sound like a high-tech farming term, but it’s actually one of the smartest and simplest ways to water your plants. Whether you have a home garden or a big farm, it’s water-wise, climate-smart, and incredibly effective.
Read on as we explain what is drip irrigation, its benefits and how farmers in India set up drip irrigation.
What is drip irrigation?
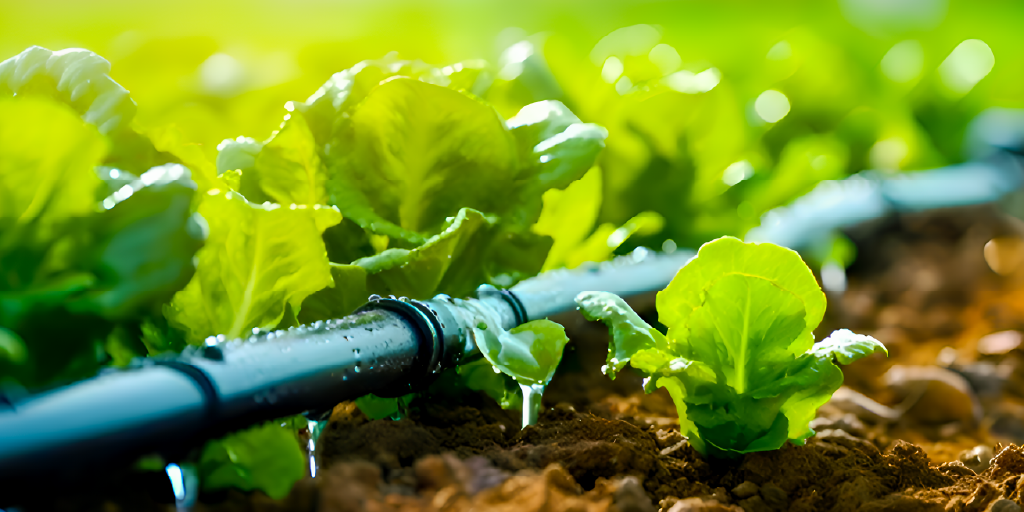
Imagine tiny tubes running through your garden, gently delivering drops of water right at the base of your plants. This system uses pipes or tubes fitted with small emitters that release water slowly and steadily, right into the soil near the plant roots. It’s like giving your plants a perfectly measured drink, exactly when and where they need it.
The benefits of drip irrigation are manifold:
- Drip irrigation and the environment
Drip irrigation is a smart and sustainable way to farm that helps both farmers and the soil.
It helps tackle climate challenges like water scarcity, droughts, and irregular rainfall by using water efficiently and supporting consistent crop growth. Since the water goes directly to the roots, there is less waste, fewer weeds, and healthier soil. This also means farmers spend less on energy and irrigation systems.
And here’s something cooler: some drip irrigation pipes are made using recycled plastic. With multi-layer technology, up to 80% of the pipe can come from recycled material which reduces waste and gives plastic a second life. It’s sustainable farming in action. With drip irrigation, farmers can grow better crops and take care of the environment at the same time.
Plus, with less water used and less energy required to pump it around, drip irrigation also helps cut down on electricity costs and carbon emissions.
- Supporting organic farming
If you’re into organic farming or planning to start, drip irrigation can be an invaluable solution:
- Healthier crops: Water is delivered directly to the roots, promoting optimal growth and higher yields.
- Reduced weeds and diseases: Only the plants receive water, minimizing weed growth and lowering the risk of fungal infections.
- Efficient nutrient delivery: Organic fertilizers can be mixed with irrigation water, ensuring nutrients reach the plants precisely where needed.
- Improved soil health: Drip irrigation helps prevent erosion, avoids waterlogging, and maintains soil structure.
- Maximized space utilization: Ideal for dense planting, urban gardens, or rooftop cultivation.
Setting up drip irrigation might seem tricky, but it’s actually simple to set up once you understand the basics. Here’s how you can get started step by step.
1. Plan the layout
Start by understanding your garden or farm space. Look at what kinds of plants you’re growing and group them based on how much water they need. For example, leafy greens may need more frequent watering than root vegetables. This helps you avoid over or under-watering.
Sketch out your space and decide where the main water pipe should go. If you have a larger area, divide it into zones so each section can be watered separately. This is especially useful for fields or big kitchen gardens.
2. Connect to a water source
Begin by attaching your system to a reliable water source. It could be a tap, borewell, or even a tank. Install a backflow preventer so that dirty water doesn’t flow back into your drinking water supply.
Next, add a filter to catch any dirt or particles in the water that might clog your pipes or emitters. This is super important, especially if your water comes from ponds, tanks, or open wells.
If the water pressure is too high, include a pressure regulator to prevent damage to the pipes and ensure water flows evenly through all the emitters.
You can also install a timer or controller to automate the system. This means your plants get water even if you’re not around.
3. Assemble and install
Place the mainline pipe across your space according to your plan. Use connectors to guide the pipe around corners or between plant beds. Make small holes in the pipe where you want to water each plant and attach the emitters. These will slowly drip water directly at the base of each plant, right where it’s needed. Secure the pipes in place using clips or fasteners. Do not use nails or sharp tools that might damage the pipe.
Once all emitters are attached, close the ends of the pipes with end caps. Turn on the water and check if it flows evenly through all emitters. Each one should drip gently. To finish, cover the pipes with soil or mulch. This protects them from sunlight, helps prevent damage from animals, and reduces water loss through evaporation.
Drip irrigation is a simple, effective way to water your plants while saving time and resources. It’s a smart choice for healthier crops and a more sustainable farm or garden.

